The world is terrible. There are dishonest, tech-savvy persons that would love to break into your WordPress website and wreak havoc on all of your files and data. Fortunately, there are things you can do to stop that from happening.
Thankfully, your website doesn’t have to suffer. Here are 11 methods for securing your WordPress blog against hackers.
Post Contents :
- Keep your plugin up to date.
- Avoid the “admin” username.
- Grant admin access by IP.
- Use strong passwords.
- Limit the number of login attempts allowed.
- Encrypt important data with security keys.
- Keep WordPress up to date.
- Disable error reporting.
- Use two-step authentication.
- Conceal your login page.
- Scan your site for dangers.
1. Keep Your Plugins Up to Date
It may seem strange that you must keep your plugins updated in order to make your WordPress website secure. But this has happened before.
Just because a developer publishes an update doesn’t mean your site will instantly receive it. When an update for one or more of your plugins becomes available, WordPress frequently notifies you.
As soon as you see that, update the plugin right away. The most recent patch might close a security hole that the author (or someone else) found.
2. Avoid Using the “Admin” User Name
Your WordPress installation may occasionally establish an administrator account with the username “admin.” Please change that name right away.
WordPress hackers with experience are pretty accustomed to default installations. They may attempt a so-called “brute force” hack using the user name “admin” because they are aware that it is frequently created as the default administrator account.
3. Grant Admin Access by IP
Although this is a bit of an advanced step, it’s worthwhile if you’re the only person with the authority to manage your WordPress site. By IP address, you can limit access to administrative functions.
Four numbers make up your IP address, which is how the internet recognizes you. It can be compared to your online address.
You can instruct WordPress to allow access to the administration console only from a particular IP address. Therefore, any other IP address attempts by hackers to access your website would fail.
To activate this crucial security feature, first find out your IP address by visiting whatismyip.com. Then, in order to make the security update, you must adjust the “.htaccess” file located in the admin directory of your host provider. Call the technical support line for your hosting provider if you don’t know how to accomplish that and ask a professional to assist you.
Specifically, you’ll want something that looks like this added to the file:
<Files wp-login.php>
order deny,allow
Deny from all
Allow from xxx.xxx.xxx.xxx
</Files>
Put the IP address that appeared when you went to whatismyip.com in place of “xxx.xxx.xxx.xxx.” The file will then be saved, and only users with your IP address will henceforth be authorized to access the WordPress administration dashboard.
4. Use a Strong Password
Because it’s simple to remember, it can be alluring to use the name of your pet as a password. You should, however, choose a more secure option.
A password should include at least 12 characters, according to best practices. Those symbols should be a mixture of numbers, symbols, and upper- and lower-case letters. The password must be incomprehensible to the unaided eye and should not be available in a dictionary. This will prevent hackers from figuring it out.
5. Limit Login Attempts
You can restrict login attempts to better defend your website against the risk of brute force assaults. In this method, when someone repeatedly types the incorrect password, they are temporarily shut out of the website.
You can use a plugin named Limit Login Attempts to implement this function. It will allow you to select the maximum number of erroneous passwords that can be entered before locking off the user’s IP address. Additionally, you can decide to receive an email when attempting to log in but failing.
6. Encrypt Important Data With Security Keys
The WordPress security key exists to encrypt the information stored in the visitor’s cookie. However, the installation may not have these keys entered by default. To verify that the key is entered, check the wp-config.php file in your installation. It’s in the root file of your website. If you have trouble finding it, please contact your hosting provider’s technical support. If the configuration file contains a stanza like the one in the image below, no key has been entered.

In this case, you will have to enter these keys yourself. You can generate keys using the WordPress salt key generator. You can then copy the code that appears on the screen and paste it into the code block above.

Save the file and you now have added security.
7. Keep WordPress Updated
Your WordPress installation will notify you when major updates are available. We recommend that you update the file once the security threat has been resolved.
8. Disable Error Reporting
It makes sense that error reporting would be beneficial. Unfortunately, because it could reveal your server path, it’s also helpful to hackers.
Access your wp-config.php file and add the following lines to disable error reporting:
error_reporting(0);
@ini_set(‘display_errors’, 0);
9. Implement Two-Step Authentication
Although two-step authentication makes the login process for authorised users more challenging and tedious, it greatly reduces the amount of undesirables that can access your website.
There are many plugins that make two-step authentication for WordPress possible. Let’s look at a couple of them.
- Google Authenticator: Requires your users to enter a key or QR code that’s delivered to their smartphones.
- Clef: Facilitates ‘passwordless’ two-step authentication using mobile devices.
- Clockwork SMS: Handles two-step authentication with the assistance of text messaging.
- Authy: Requires users to enter an API key from a smartphone application.
- Stealth Login Page: Creates an additional authorization code required for login.
10. Conceal Your Login Page
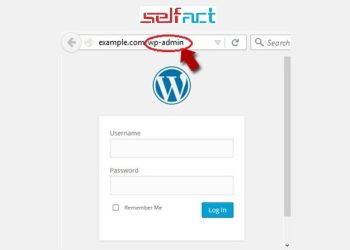
Almost all hackers are aware that appending /wp-admin to the end of the domain name often allows access to the WordPress admin page. For instance, if your domain name is xyz.com, you can likely reach your admin page by going to http://xyz.com/wp-admin. Additionally, they are aware that the login page’s URL is wp-login.php. Fortunately, you can change that. There are plugins available, such as WPS Hide Login, that enable you to customize your login URL.

11. Scan Your WordPress Site for Possible Dangers

Most likely, you already have anti-virus software running on your computer that periodically analyses your hard drive for dangers. Additionally, you ought to scan your WordPress installation.


